Oct 28, 2006

Save Windows Update Downloads

If you use the regular Windows Update Web site, updates you select are downloaded and installed, you are not offered the option to save them for later use, or for distribution to non-Internet connected PC's. Nor can you download updates for other computers (hardware/software drivers for example). Also, a System Restore could overwrite updated files, but Windows Update would still show the update as installed, and won't let you download them again.

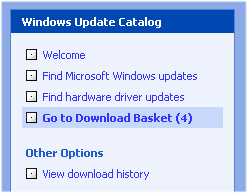
To save Windows Update files, connect to the Windows Update Catalog (Also referred to as Corporate Windows Update) site.

Here you can download all updates for all Windows XP OS types, and driver updates. Any updates you select will be collected in your Download Basket. If you have all updates you need, click on the link for your Download Basket. Here you can review/remove the updates you have selected. Press the Browse button to browse for a folder on your system/network where you want to save the files, then press the Download Now button. You have to accept the License Agreement, after which the files will be downloaded.

SQL Server 2005 Installation

Installing SQL Server 2005

We used the CDs from the 2 CD set for SQL server 2005 enterprise.

  • Insert the first CD, it autostarts. In the 'Install' section, click 'Server components tools etc.'. This launches the setup.exe program.
  • Accept the license agreement. Click Next.
  • At the next window (Installing Prerequisites), the installer says that it needs to install .Net 2.0, MS SQL Native Client and SQL Server 2005 Setup Support Files. Click 'Install'. This took about 5 minutes. Got a message saying 'The required components were installed successfully'. Click 'Next'.
  • 'Welcome to the Microsoft SQL Server Installation Wizard'. Click 'Next'
  • 'System configuration check'. Passed 13 of 14 tests. Got a warning about IIS requirement. Need to enable IIS (Manage your server, select application server role etc.), then restart setup. This time I got 14/14 as a result of the system configuration check. Press 'Next'.
  • The licensing key was embedded and known at the Registration Information screen. Press 'Next'.
  • At the 'Components to Install' screen, you must select which components you want to install from this list :
    1. SQL Server Database services
    2. Analysis services
    3. Reporting services
    4. Notification services
    5. Integration services
    6. Workstation components, books online and development tools

    Select SQL Server Database services, and Workstation components etc. and press 'Next'.

  • At the 'Instance Name' screen, accept the default and press 'Next'.
  • At the service accounts page, select to use a domain account. Tried to use adstmsql, but not accepted. Using the Local system account for now. This is not recommended. In the services section, check the box that says "SQL Server Agent" to make sure this service auto-starts. Press 'Next'.
  • At the Authentication mode screen, switch from the default - Windows Authentication Mode to Mixed mode. Enter a password for the sa account. Press 'Next'.
  • At the 'Collation Settings' screen, accepted the default. Press 'Next'.
  • At the 'Report server installation' options, accepted the default. Press 'Next'.
  • At the 'Error Reporting' screen, accepted the defaults (nothing checked). Press 'Next'.
  • At the 'Ready to Install' screen, review the list, Press 'Install'. The installation took 10-15 minutes on track it. Press 'Next'.
  • Read the 'Summary Log' at the 'Completing Microsoft SQL Server 2005 setup screen. Then press 'Finish' to exit the install.

Note:By default, the installation placed the program files for SQL server and the data and log files for the database on the C drive. There was no option to change this during the installation. To configure different locations for the data and logs directories, you need to start the SQL Server Management Studio and edit the properties of the default installation.

Applying Service Pack 1 to SQL Server 2005.

Note: We should have rebooted after the initial install to clear "pending file operations" messages we received during the service pack installation.

These are the steps we used to apply SP1.

  • Download SP1 from http://www.microsoft.com/sql/downloads and save it to a local directory. The file was 252MB in size.
  • Double click on the downloaded exe file.
  • Accept the license agreement and click next.
  • Check the box that says upgrade all instances, use sa and the administrator password to connect and click next.
  • At this point we got warnings about "file operations pending" and tried to start "SQL server management studio" to stop the database. We could not connect to the database. Selected 'cancel' from the file operations pending warning. Two upgrade operations were canceled - Database services and Client components.
  • Rebooted the server, restarted the service pack upgrade, accepted the license, got the "file operations pending" message again and selected "continue". All components were updated successfully. Rebooted the server to complete the service pack upgrade.

Connecting to the database locally

To connect to the database on the local server, run Start, Programs, Microsoft SQL Server 2005 and select SQL Server Management Studio.

Connecting remotely

  • On the SQL server host, run Start, Programs, Microsoft SQL Server 2005, Configuration Tools and select SQL Server Surface Area Configuration.
  • Under 'Configure Surface Area for localhost', click on Surface Area Configuration for Services and Connections.
  • In the Surface Area Configuration for Services and Connections box, the View by Instance box lists the instances of the Database Engine installed on the computer. The default instance (an unnamed instance) is listed as MSSQLSERVER. If you installed a named instance, the name you provided is listed. In the View by Instance box, expand the instance you wish to configure, expand Database Engine, and then click Remote Connections.
  • For 'Local and remote connections', click the radio button for Using TCP/IP only, then click OK and close the tool.

Setting a specific port to listen on

  • In SQL Server Configuration Manager, expand SQL Server 2005 Network Configuration, and then click on the server instance you wish to configure.
  • In the right pane, double-click TCP/IP.
  • In the TCP/IP Properties dialog box, click the IP Addresses tab.
  • In the TCP Port box of the IPAll section, type an available port number. I used 1500.
  • Click OK to close the dialog box, and click OK to the warning that the service must be restarted.
  • In the left pane, click SQL Server 2005 Services.
  • In the right pane, right-click the instance of SQL Server, and then click Restart. When the Database Engine restarts, it will listen on port 1500.
  • Firewall not enabled on syslab23 ???

Installing the tools on a client computer

In order to be able to manage the database instances from a remote computer, you need to install the SQL management tools. In order to do this, follow these steps:

  • Insert the 2nd cd of the 2 cd set. If it does not auto start, use Start, Run, d:\splash.hta
  • Check the box to accept the license agreement and press 'Next'
  • The install will install some prerequisite software :
    • The dot Net Framework 2.0
    • some other thing here I think
    • Microsoft SQL server 2005 setup support files
    Once these are installed, click 'Next'
  • The installer runs a system configuration check. On an XP client, you should get warnings about the minimum OS requirement, an IIS feature requirement and possibly some minimum hardware requirements. We're only installing the client tools, so press 'Next'.
  • Accept or enter the registration information, and press 'Next'.
  • Expand 'Client components' and modify the installation so that all of 'Connectivity components' and 'Management tools' are installed. Press 'Next'.
  • Leave the defaults (unchecked) regarding sending error message to microsoft or a corporate error reporting server. Press 'Next'.
  • At the 'ready to install' screen, review the list and press 'Install'. Press 'Next' when the installation is complete and then 'Finish' at the next screen.

Oct 27, 2006

Google Co-op Custom Search Engine

Google Co-op added a new service to create your own search engine. Google Co-op

Google Co-op custom search engine allows you to place a search box and search results on your website using your own design(similar to AdSense search on your site).

You can specify or prioritize the websites you want to include in searches. Also, you can invite your friends to contribute and build a search engine for your community.

Oct 16, 2006

Windows XP Shortcuts II

Code & Description Shown below:
Run Commands to access the control panel: Code:
Add/Remove Programs control - appwiz.cpl
Date/Time Properties control - timedate.cpl
Display Properties control - desk.cpl
FindFast control - findfast.cpl
Fonts Folder control - fonts
Internet Properties control - inetcpl.cpl
Keyboard Properties control - main.cpl keyboard
Mouse Properties control - main.cpl Multimedia
Properties control - mmsys.cpl
Network Properties control - netcpl.cpl
Password Properties control - password.cpl
Printers Folder control - printers
Sound Properties control - mmsys.cpl sounds
System Properties control - sysdm.cpl

Windows XP Shortcuts I

Code & Description Shown below:
Run Commands: Code:
compmgmt.msc - Computer management
devmgmt.msc - Device manager
diskmgmt.msc - Disk management
dfrg.msc - Disk defrag
eventvwr.msc - Event viewer
fsmgmt.msc - Shared folders
gpedit.msc - Group policies
lusrmgr.msc - Local users and groups
perfmon.msc - Performance monitor
rsop.msc - Resultant set of policies
secpol.msc - Local security settings
services.msc - Various Services
msconfig - System Configuration Utility
regedit - Registry Editor
msinfo32 - System Information
sysedit - System Edit
win.ini - windows loading information(also system.ini)
winver - Shows current version of windows
mailto: - Opens default email client
command - Opens command prompt

Tips

12 Tips for Delivering a Knockout Business Presentation From Wendy Russell (about.com
  1. Know your material: Knowing your material thoroughly will help you decide what information is essential to your presentation and what can be left out. It will help your presentation to flow naturally, allowing you to adjust to unexpected questions or events, and it will help you feel more comfortable when speaking in front of an audience. 
  2. Don't Memorize: This is, after all, a presentation, not a recital. Every presentation needs two major components -- life and energy. Recite from memory and your presentation will be sadly lacking both of these factors. Not only will you lose your audience, but you will be hard-pressed to adapt to unexpected events that may throw you off your mental script. 
  3. Rehearse Your Presentation: Rehearse your presentation out loud, accompanied by the slide show. If possible, get someone to listen while you rehearse. Have the person sit at the back of the room so you can practice speaking loudly and clearly. Ask your listener for honest feedback about your presentation skills. Make changes where necessary and run through the whole show again. Keep repeating until you feel comfortable with the process. 
  4. Pace Yourself: As part of your practice, learn to pace your presentation. Generally, you should spend about one minute per slide. If there are time constraints, make sure that the presentation will finish on time. During your delivery, be ready to adjust your pace in case you need to clarify information for your audience or answer questions. 
  5. Know the Room: Be familiar with the place in which you will speak. Arrive ahead of time, walk around the speaking area, and sit in the seats. Seeing the setup from your audience's perspective will help you decide where to stand, what direction to face, and how loudly you will need to speak. 
  6. Know the Equipment: If you are using a microphone, make sure it works. The same goes for the projector. If it's your projector, carry a spare bulb. Also, check to see if the projector is bright enough to overpower the room's lighting. If not, find out how to dim the lights. 
  7. Copy Your Presentation to the Computer's Hard Drive: Whenever possible, run your presentation from the hard disk rather than a CD. Running the show from a CD may slow your presentation. 
  8. Use Remote Control: Don't hide at the back of the room with the projector. Get upfront where your audience can see and hear you. Also, just because you have a remote, don't wander around the room -- it will only distract your audience. Remember you are the focal point of the presentation. 
  9. Avoid Using a Laser Pointer : Often the projected light dot on a laser pointer is too small to be seen effectively. If you are at all nervous, the dot may be hard to hold still in your shaking hands. Besides, a slide should hold only key phrases. You are there to fill in the details for your audience. If there is vital information in the form of a chart or graph that you feel your audience must have, put it in a handout and refer to it rather than having to point out specific details of a slide to your audience. 
  10. Do Not Speak to Your Slides: Many presenters watch their presentation rather than their audience. You made the slides, so you already know what is on them. Turn to your audience and make eye contact with them. It will make it easier for them to hear what you are saying, and they will find your presentation much more interesting. 
  11. Learn To Navigate Your Presentation: Audiences often ask to see the previous screen again. Practice moving forward and backwards through your slides. With PowerPoint, you can also move through your presentation non-sequentially. Learn how to jump ahead or back to a certain slide, without having to go through the entire presentation. 
  12. Have a Backup Plan: What if your projector dies? Or the computer crashes? Or the CD drive doesn't work? Or your CD gets stepped on? For the first two, you may have no choice but to go with an AV free presentation, so have a printed copy of your notes with you. For the last two, carry a backup of your presentation on a USB flash drive or email yourself a copy, or better yet, do both.
Oct 12, 2006

Tips & Tricks

Extend or Reset Trial Period of Trial Demo Software

A lot of software and applications are released as a shareware, also known as demoware (demo) or trialware (trial version), where users can download the trial version shareware from the Internet or get the apps from distributed magazine cover-disks, and use it for a stipulated period of time (trial period), free or charge without any payment. The plan is sort of “try before you buy”, where if users satisfy with the software after trying it, they should buy the program by paying a license fee to the developer. After passing the trial expiry date and time (expiry of trial period), the software will either stop working, or continue working with limited or restricted features, or displays a reminder message about expired trial demo license.

So what if you want to extend the duration of the trial period of the demo apps to fully evaluate it? Or you have installed the demo software or shareware, but suddenly busy with works or something else, and when finally free, the trial valid date has passed? Or you may be decided that the shareware is not worth to pay? The solution or workaround is to extend or reset the trial apps expiry date and time, or its trial period, so that users can continue to using the trial shareware without crack or hack.

How to extend or reset the trial period of shareware, trial-ware, demo-ware or trial software?

Method 1

Reinstall the program. This is the easiest method, but highly likely that it won’t work mostly on current modern software, as the expiry check algorithm getting sophisticated by keeping the expiry information on started using date and days allowed for try use plus days left in the trial in the registry or in a randomly named file.

Method 2

Adjusting the clock (date and time) of your computer system before starting installation of trial software to future data, or adjusting the clock to past date after expired trial period. Again, this method most likely won’t work.

Method 3

Use a application installation monitoring software or uninstaller software such as Norton Cleansweep, Your Uninstaller! 2006 and Advanced Uninstaller PRO 2006 to keep track and monitor every changes to the system during installation, and then uninstall and revert the shareware completely to remove all traces of trial expiry data.

Method 4

Backup the registry before installation of software, and restore the registry after trial period passed. Only works on those shareware that store protection information in registry, and you will lose some important registry changes by Windows or other applications. Alternatively, use Regmon to monitor registry activity in real-time to identify possible candidates for trial expiry reg keys, and then delete those keys.

Method 5

Reinstall windows, and you can be sure that you can use all trial demo shareware again, as all dummy registry entries and dummy files that store trial information are wiped off.

Method 6

Find a crack, with the help of cracks search engine such as Astalavista. But this is not extending the trial period of software.

Method 7

Search with various search engines such as Google and Yahoo! for application-specific known workarounds.

Method 8

If you use any of the following software, then Trial-Reset can helps you to extend the trial period of the software. Trial-Reset is an registry cleaning tool (it claims it’s not a crack) that removes the keys generated by commercial and freeware protector of trial period, and hence makes the software as if just freshly installed. It actually automates the process of cleaning up the registry key related to trial expiry mentioned above. The software and its protected that Trial-Reset (version 3.0 RC3) supports and able to strips are as below.

ACProtect
ActiveMark
Armadillo
ASProtect
DBPE
EncryptPE
Enigma
ExeCryptor
ExeShield
ICE License
NoCopy
Obsidium
OneWay
Orien
PCGuard
ProtectionPlus
ProtectShareware
SafeSerial
SDProtector
Sheriff
SGLicense
ShareGuard
SoftLocx
SoftSentry
SoftWrap
STProtector
SVKPThinstall
VBOLock
VBox
VisualProtect
Xheo Licensing
XProtector
ZipWorx

To use Trial-Reset, just select which software protector that you want to scan for existance on the right hand side of the window. If the registry of the protector is found, make sure you you review the key to ensure that it’s the correct key that stores trial information. Then you can opt to backup the key, remove the key, add the key to protect list and other options.

Trial-Reset 3.0 RC3 can be downloaded here (Trial-Reset30RC2.rar). Future update can be found here.